Server cloning
Cloning the system disk in e24cloud
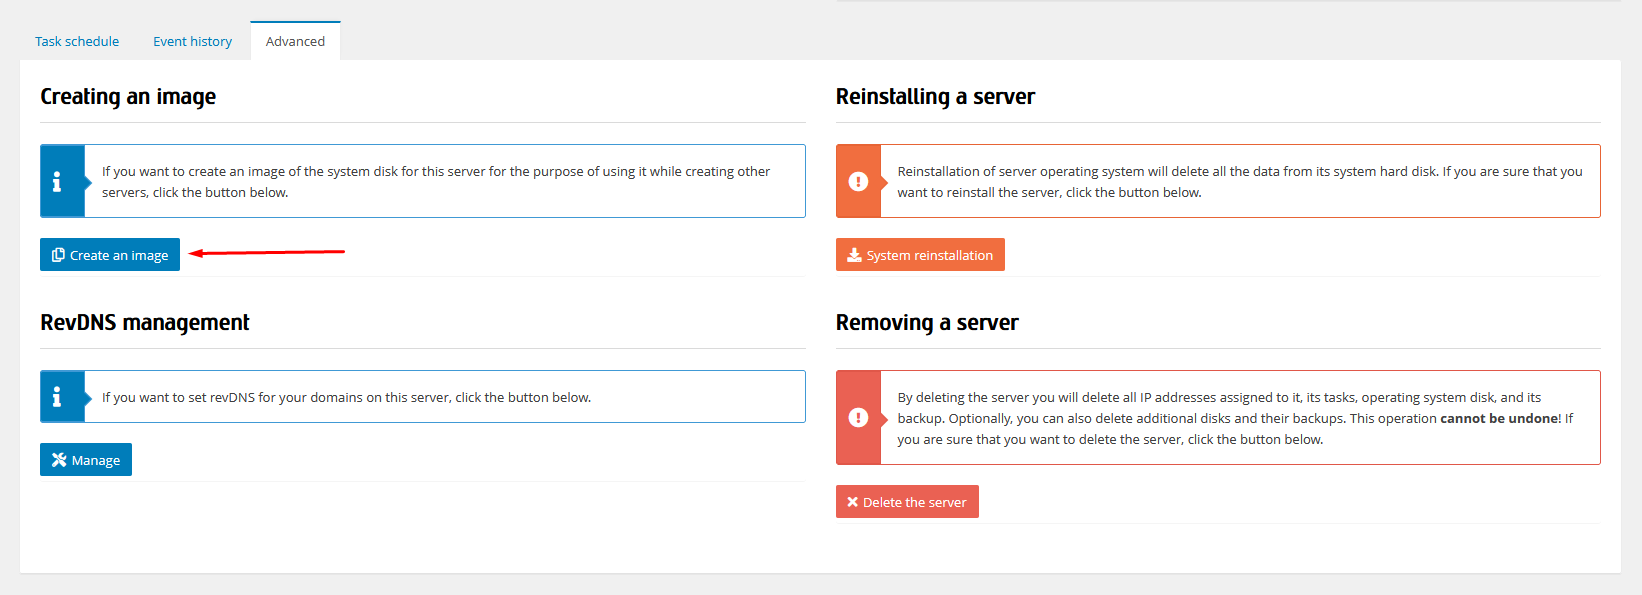
Cloning a server should begin with cloning the system disk. If the server does not have any additional disks, this will be the only step. First, create an image of the server. To do this, select the server, go to the Advanced tab and select Create image.

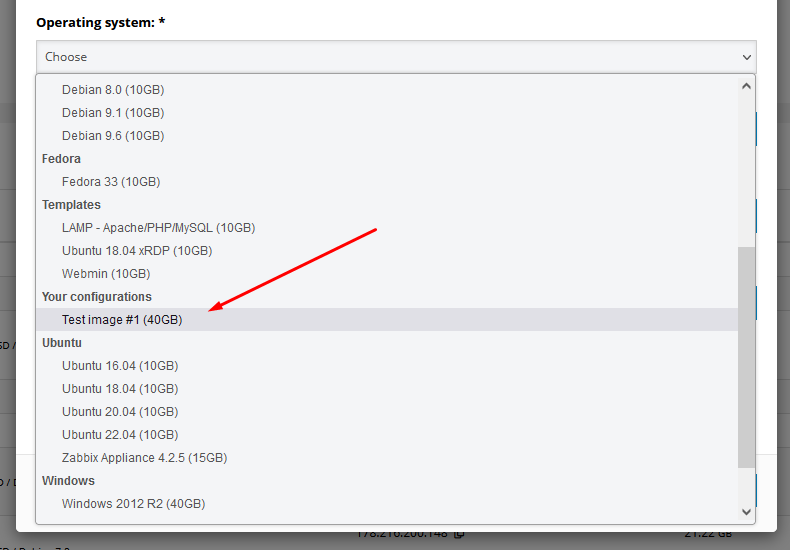
Next, create a new server with the same parameters as the cloned server. The only difference is in the Operating system field, where you choose the image previously created from the list. As additional startup configuration, you can leave the option for SSH Key selected without choosing any key - the configuration will remain unchanged from the cloned server.

Cloning and backup of an additional disk in e24cloud
Cloning an additional disk starts with creating a backup of that disk. To do this, go to the Resources tab, Virtual Disks and select Create backup for the disk that interests us.

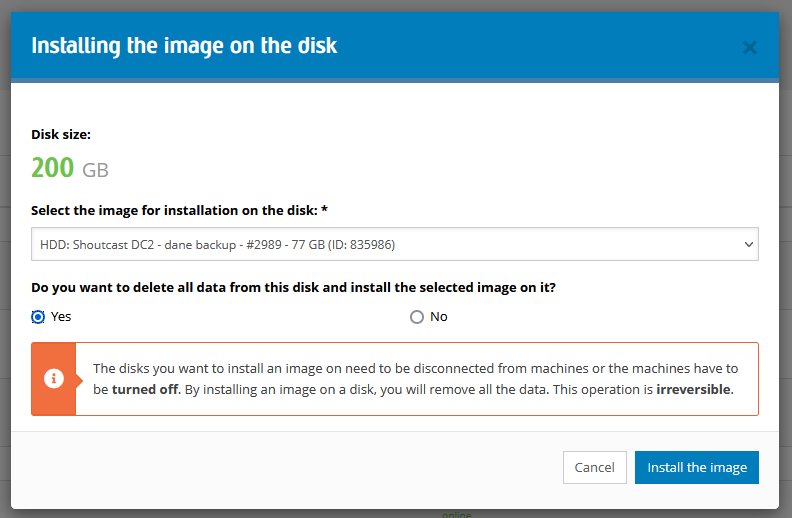
When the backup creation process is complete, select the target additional disk on the cloned server, select Install backup and in the Select an image to install on the disk field, select the backup created in the previous step.


You can monitor the progress of the backup restoration process in the Images and backups tab. After the backup restoration process is complete, you will receive an email notification of the server where the backup was restored.