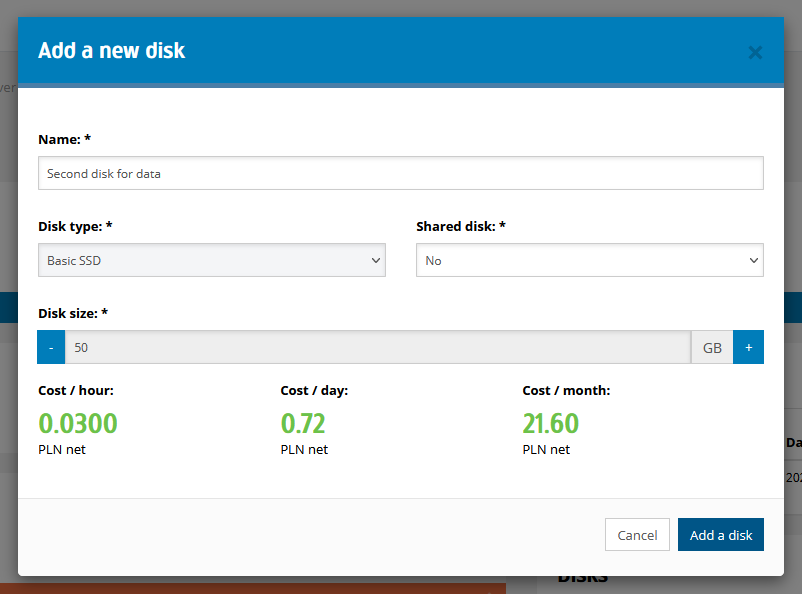
Adding a hard disk to a virtual machine
To add a hard disk to a virtual machine, you need to find the Disks section on the detailed view of the server. Then click the Add button.

Specify the parameters of the new hard disk. Choose its name, size in GB, and type (SSD or HDD). At the bottom of the window, the system will automatically calculate and display the costs of the new disk.

After creating the disk, it should be visible on the list with the appropriate name and size that we chose during creation.

The disk is now connected to the virtual machine. Additional steps are required to connect the disk to the system. Please find the instructions below for this operation.
Instructions for Linux systems
The additional disk should be visible in the system as /dev/vdb. You can check it by executing the fdisk -l command:
Disk /dev/vdb: 53.7 GB, bytes: 53687091200
Before connecting the disk to the system for the first time, the file system is not initialized. You need to initialize it, specifying the type of file system. For the most popular ext4 file system, the command will look as follows:
mkfs.ext4 /dev/vdb
NOTE - the above command creates a new file system on the partition. If there is already data on the disk, it will be permanently deleted.
The last step is to mount the disk in the system using the following command:
mount /dev/vdb /mnt
The command allows you to connect the new space to the /mnt folder. Of course, you can create any folder and specify it instead of mnt.
Below is another example using LVM technology.

Instructions for Windows systems
The additional disk is visible in the disk management console.
To access the disk management panel, please go to: Start -> Administrative Tools -> Computer Management.
Then in the new window, go to Storage -> Disk Management.
There is a list of disks and partitions visible in the system.
It may be necessary to perform a SCSI bus rescan (or reboot the OS).